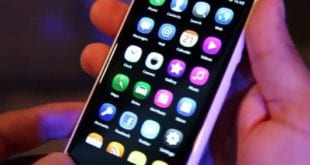
Fuente: http://mynokiablog.com/2012/04/24/operationunicorn-n9-housing-swap-cyan-to-white-tutorial-info/
OS DEJO LA WEB DE UN VALIENTE QUE SE HA ATREVIDO A DESMONTAR SU NOKIA N9.
SI SOIS MAÑOSOS Y AÚN NO LE TENÉIS MUCHO CARIÑO, PODÉIS INTENTARLO.
YO HE DESMONTADO VARIOS IPHONES, NOKIAS, GALAXYS, PDAS,… NO PARECE MUY COMPLICADO, PERO JUGÁRTELA POR CAMBIAR EL COLOR JEJE!!
LO GUARDO POR SI ME CARGO LA PANTALLA, O LA PESTAÑITA DEL USB QUE NO ME DA NINGUNA CONFIANZA(CON LO BONITO QUE ES, VAYA “MIELDA” DE SOLUCIÓN AL USB)…
ESO SÍ, OLVIDAROS DE LA GARANTÍA.
You may have read a few weeks ago, I mentioned I purchased a White housing for my N9. I had a few readers ask for me to publish a few photos of the process as well as a video of what to do.
I did follow this video here. Although it is in Russian, it is easy to understand what is going on.
I also used the N9 Service Manual as a bit of a guide when I got stuck with the video.
What do I need?
- Firstly, the housing case. I bought mine on eBay. Look for ones with Sim Tray and USB Door (tools is a bonus). This was mine
- Torx T4 screwdriver
- Phillips size 00 screwdriver
- Tweezers
- Patience & someone to pray to
I won’t be posting a video, as I had an issue of my own, where I had a screw with a worn head, and, well, let’s just say I wasn’t very nice and my N9 took a well deserved holiday until I could get hold of a new battery. Which was about 3 hours as a Lumia 800 showed up on my door. Had a play around with it, and went straight to cannibalisation.
Questions I’ve been asked;
- “Do you need to change hardware apart from the casing?” – No, as long as you don’t break anything or lose any screws. You simply unscrew the components and screw them on to the new body
- “Does this void warranty?” – As far as I know, yes. If you are not comfortable doing such a thing and taking a risk, don’t do it. The only person responsible for your actions is yourself. So don’t hold me (or MyNokiaBlog) liable.
- “Do I need any special equipment?” – Apart from a T4 screwdriver, no. The manual does say to use a dentist tool and a special Nokia tool, but you can use the tweezers and flat head screwdriver for that.
- “Do you have a list of prayers to say before starting?” – Yes, all of them!
- “How difficult was the process?” – Not that hard. Was a bit scared that I would stuff up (which I did but wasn’t my fault), but in the end it worked. Just don’t rush and follow the instructions. If you have a worn screw head, stop straight away, and search for ways to fix it. < Learn from my mistake. Oh, and stay calm.
Pictures of the diss-assembly can be found on my flickr account
Michael
¿Te ha gustado la entrada SÍGUENOS EN TWITTER O INVITANOS A UN CAFE?
 Blog Virtualizacion Tu Blog de Virtualización en Español. Maquinas Virtuales (El Blog de Negu) en castellano. Blog informática vExpert Raul Unzue


yo tengo un lumia 800 q no carga q es lo q tengo q haser
¿Ha pasado algo concreto?
Yo los pasos que seguiría:
– Revisar aspecto exterior por si hay algo suelto
– Conectar a ordenador para ver si lo reconoce
– Si lo reconoce es la pantalla
– Sino asegurarte que los cables de carga están bien
– El conector usb puede estar averiado
– Sino puede ser la batería
– Y sino es la placa
Yo no tengo un lumia, pero después de arreglar otros modelos es lo que miraría