Gestión de perfiles con FSLogix en Citrix
Una de las herramientas que más me han sorprendido este año, por algo la ha comprado Microsoft es FSLogix. Tenía pendiente realizar una entrada sobre este software, y la semana pasada conversando con Héctor Herrero (Bujarra.com) y Ricard Ibañez (cenabit.com) en el VMware World en Barcelona surgieron conversaciones sobre proyectos Citrix en este caso. Es verdad que también podéis usarlo para acelerar escritorios VDI de VMware, por ejemplo.
Es una gran alternativa a UPM, que os puede ayudar a mejorar los tiempos de logon, como podréis ver en varios webs de Citrix CTP.
SISTEMAS COMPATIBLES FSLOGIX
Fslogix es compatible con Windows 7 o superior y Windows 2008 R2 o superior si se trabaja con contenedores VHD. Para poder trabajar con contenedores VHDX necesitarías Windows 8 o superior y Windows 2012 o superior que es cuando se introdujeron. Así que si usáis Windows XP todavía no es vuestra herramienta.
Las principales diferencia entre VHDX y VHD son:
- La eliminación del límite de 2TB que tenían los discos VHD, llegando los VDHX hasta 64TB
- Mucho más robusto contra la corrupción de datos VHDX
- Mejor rendimiento general de VHDX
INSTALACION FSLOGIX
Lo que sorprende de FSLogix es su facilidad de instalación. Estamos hablando de un software que, como UPM, no necesita ni base de datos, ni servidor web o de aplicaciones para trabajar. Sólo necesita un servidor de ficheros donde guardar los perfiles de los usuarios y un agente que se instala en las VDAs de Citrix.
El resto de parametrización se realiza vía GPO de directorio activo. Literalmente, te puede llevar una implantación unos minutos si ya las has hecho previamente y tienes todo bien documentado.
A nivel de recurso de ficheros compartido se necesitan los siguientes permisos:
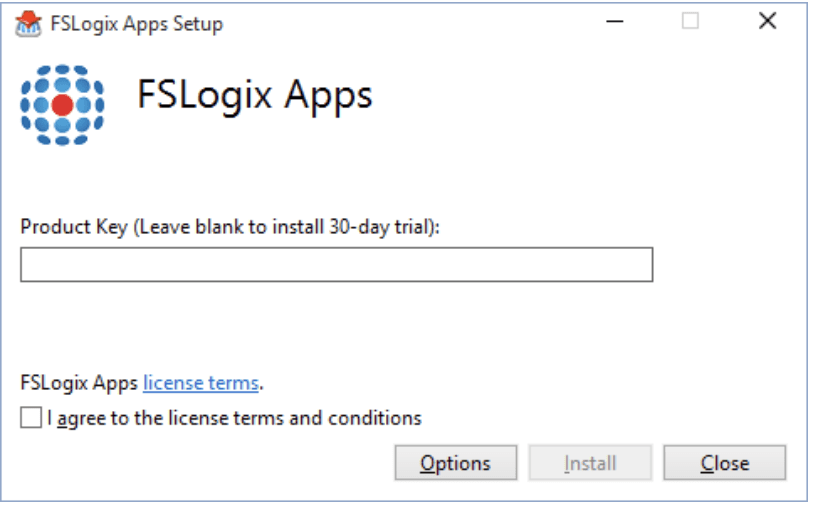
La instalación de agente tiene dos clics de ratón donde lo más especial es que te pide la licencia:
https://docs.fslogix.com/display/20170529/FSLogix+Apps+Agent+Installation
Si lo queréis hacer por powershell:
|
1 |
FSLogixAppsSetup.exe /install /quiet /norestartProductKey=KEY_FSLOGIX |
¿COMO FUNCIONA FSLOGIX?
El mayor problema de UPM es la carpeta %APPDATA% y los ficheros que suelen dejar muchas aplicaciones en ella. FSLogix logra trabajar con perfiles muy grandes, de hasta 30GB, casi sin despeinarse.
Si tenéis algo de experiencia con UPM, en infraestructuras con menos de 300 usuarios no suele dar problemas, cuando pasas de ahí, hay que afinar mucho para evitarlos.
¿Cómo mejora FSlogix esto? Cuando un usuario se loguea, se genera un container VHD/VHDX en el servidor de ficheros, encapsulando todo el perfil en un fichero. Cuando el usuario vuelve a loguearse sólo se trae lo justo y necesario para que el login se complete. Haciendo que el logon se acelere bastantes segundos en algunos casos.
Decir que el primer logon es de generación del container y tarda más de lo normal, en los siguientes se ve la diferencia. Al final trabaja con punteros y reduce la descarga del perfil un 95% que hace que no tenga rival.
Elimina la redirección de carpetas, que suelen dar muchos problemas en un logon de Citrix.
FSLOGIX CON MULTIDISPOSITIVO
FSLogix es capaz de trabajar con perfiles en multidispositivo, es decir, un usuario, por ejemplo, puede ejecutar una sesión Citrix en un Ipad y en su ordenador a la vez. Eso lo hace generando varios discos a la vez en el servidor de ficheros. Aunque con una cierta limitación, ya que para el dato sea consistente, sólo uno de ellos estará en escritura.
CONFIGURATION TOOLS FSLOGIX
Como algo adicional, que pocas veces usaréis existe una tool gráfica que os permite realizar algunos cambios básicos como la exclusión o el añadido de usuarios, el tamaño por defecto, habilitar o deshabilitar, folder redirections…
La herramienta se encuentra en C:\Program Files\FSLogix\Apps\ConfigurationTool.exe
RUTAS LOGS FSLOGIX
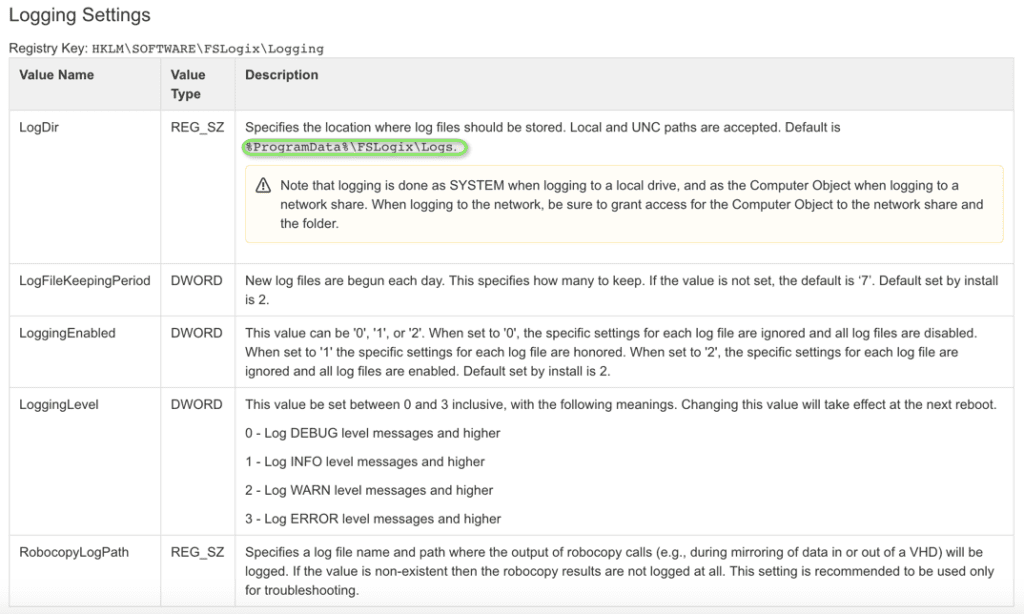
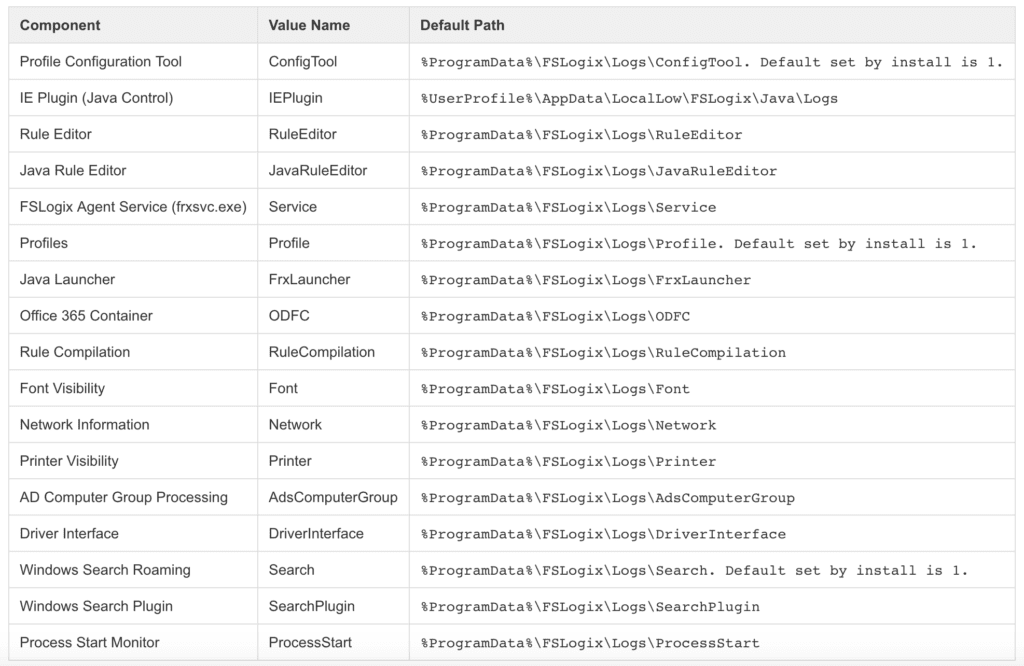
Lo normal es que lleves el log a un recurso de red donde habrá que conceder permisos también:
GPOS FSLOGIX
https://getadmx.com/?Category=FSLogix_Profile_Container&Policy=FSLogix.ProfileContainer::IsDynamic
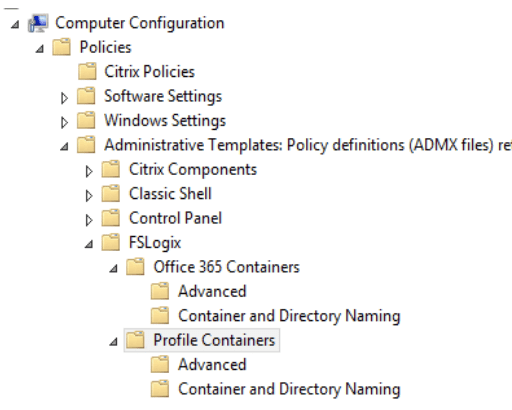
Los ficheros ADM y ADMX con las settings de las GPOs los encontraréis en la descarga del agente. Veréis que la configuración no es muy complicada. Sobre todo colocar bien la ruta al servidor de ficheros.
SCRIPT MIGRACION CITRIX UPM A FSLOGIX
(Fuente)
En la mayoría de instalaciones, las empresas suelen usar UPM para la gestión de perfiles. Como curiosidad, deciros que con FSLOGIX las métricas de Citrix Director no funcionan. Esto se debe a que el servicio de UPM es parado si se instala. Para que esto no pase, simplemente lo arrancáis. No se usa, pero Citrix Director lo necesita.
Aquí os dejo un script para hacer una migración, así como la fuente del script:
|
1 2 3 4 5 6 7 8 9 10 11 12 13 14 15 16 17 18 19 20 21 22 23 24 25 26 27 28 29 30 31 32 33 34 35 36 37 38 39 40 41 42 43 44 45 46 47 48 49 50 51 52 53 54 55 56 57 58 59 60 61 62 63 64 65 66 67 68 69 70 71 72 73 74 75 76 77 |
#Requires -RunAsAdministrator <# Written by David Ott This script will convert Citrix UPM profiles to FSLogix .vhd profiles (you should be able to edit it to do vhdx as well) Pay attention to all of the commented areas. It uses diskpart to create/mount/dismount the .vhd file, and robocopy to copy the UPM profile to the .vhd. Once executed (assuming you have edited $newprofilepath and $oldprofiles to match your environment) it will give you a list of profiles to convert. You can then select which profile(s) you wish to convert to FSLogix profiles. You could also edit this script to use hyperv commands to create/mount/dismount the vhd/vhdx files instead of diskpart if you have the hyperv module installed. Before using in production test!! #> # fslogix profile path $newprofilepath = "\\server\fslogxprofiles" ##### FSLogix Root Profile Path <# upm profile path - our production UPM root folders are username.domain, and the actual Windows 7 profile lives under v2x64\UPM_Profile: \\server\share\%USERNAME%.%USERDOMAIN%\!CTX_PROFILEVER!!CTX_OSBITNESS! this would have to be edited based on environment - the main thing is to have it have the full path to all of the actual UPM_Profile directories #> $oldprofiles = gci \\oldserver\upmprofiles | ?{$_.name -like "*.$env:userdomain"} | select -Expand fullname | sort | out-gridview -OutputMode Multiple -title "Select profile(s) to convert"| %{ Join-Path $_ "v2x64\UPM_Profile" } # foreach old profile foreach ($old in $oldprofiles) { <# Since I know that the folder has the username in it i get that and save it to the sam variable, and use that to get the user's sid then save that to $sid. You will most likely have to edit the $sam line to pull the username out of the old profile path. Play with the string and split-path until you nail down just the username. For instance let's say your current profile path is \\server\profileshare\username\v2x64\UPM_Profile you could do something like this $sam = (($old -split "profileshare")[1] -split "v2x64")[0] -replace "\\","" That splits the string at profileshare, and selects the 2nd part (0 would be the first) which is \username\v2x64\UPM_Profile it then splits that again using v2x64 and selects the first part (remember 0 is the first) which is \username\ Finally it replaces the "\" characters (you need to match \\ as \ is a special character the first slash just says to use it as a string) with nothing... leaving you with the username. #> $sam = Split-Path ($old -split ".$env:userdomain")[0] -leaf $sid = (New-Object System.Security.Principal.NTAccount($sam)).translate([System.Security.Principal.SecurityIdentifier]).Value <# A .reg file located in %localappdata%\FSLogix - last thing the script does is create the .reg file for the profilelist key #> $regtext = "Windows Registry Editor Version 5.00 [HKEY_LOCAL_MACHINE\SOFTWARE\Microsoft\Windows NT\CurrentVersion\ProfileList\$sid] `"ProfileImagePath`"=`"C:\\Users\\$sam`" `"FSL_OriginalProfileImagePath`"=`"C:\\Users\\$sam`" `"Flags`"=dword:00000000 `"State`"=dword:00000000 `"ProfileLoadTimeLow`"=dword:00000000 `"ProfileLoadTimeHigh`"=dword:00000000 `"RefCount`"=dword:00000000 `"RunLogonScriptSync`"=dword:00000000 " <# set the nfolder path to \\newprofilepath\username_sid - this is not default If you are going with the default then replace then reverse the $sam/$sid variables as below $nfolder = join-path $newprofilepath ($sid+"_"+$sam) #> $nfolder = join-path $newprofilepath ($sam+"_"+$sid) ##### See note above # if $nfolder doesn't exist - create it if (!(test-path $nfolder)) {New-Item -Path $nfolder -ItemType directory | Out-Null} & icacls $nfolder /setowner "$env:userdomain\$sam" /T /C & icacls $nfolder /grant $env:userdomain\$sam`:`(OI`)`(CI`)F /T # sets vhd to \\nfolderpath\profile_username.vhd $vhd = Join-Path $nfolder ("Profile_"+$sam+".vhd") # diskpart commands $script1 = "create vdisk file=`"$vhd`" maximum 30720 type=expandable" $script2 = "sel vdisk file=`"$vhd`"`r`nattach vdisk" $script3 = "sel vdisk file=`"$vhd`"`r`ncreate part prim`r`nselect part 1`r`nformat fs=ntfs quick" $script4 = "sel vdisk file=`"$vhd`"`r`nsel part 1`r`nassign letter=T" $script5 = "sel vdisk file`"$vhd`"`r`ndetach vdisk" $script6 = "sel vdisk file=`"$vhd`"`r`nattach vdisk readonly`"`r`ncompact vdisk" <# if the vhd doesn't exist create, attach, wait 5 seconds (windows has to catch up), create/format the partition, assigns letter T (change this as needed), and sets the disk label to Profile-username #> if (!(test-path $vhd)) { $script1 | diskpart $script2 | diskpart Start-Sleep -s 5 $script3 | diskpart $script4 | diskpart & label T: Profile-$sam New-Item -Path T:\Profile -ItemType directory | Out-Null # set permissions on the profile start-process icacls "T:\Profile /setowner SYSTEM" Start-Process icacls -ArgumentList "T:\Profile /inheritance:r" $cmd1 = "T:\Profile /grant $env:userdomain\$sam`:`(OI`)`(CI`)F" Start-Process icacls -ArgumentList "T:\Profile /grant SYSTEM`:`(OI`)`(CI`)F" Start-Process icacls -ArgumentList "T:\Profile /grant Administrators`:`(OI`)`(CI`)F" Start-Process icacls -ArgumentList $cmd1 } else { # if the vhd does exist then attach, wait 5 seconds, assign letter T $script2 | diskpart Start-Sleep -s 5 $script4 | diskpart } # copies in the UPM profile to the Profile directory on the vhd /E /Purge - this is so it will update with the latest info "Copying $old to $vhd" & robocopy $old T:\Profile /E /Purge /r:0 | Out-Null # creates the %localappdata%\FSLogix path if it doesnt exist if (!(Test-Path "T:\Profile\AppData\Local\FSLogix")) { New-Item -Path "T:\Profile\AppData\Local\FSLogix" -ItemType directory | Out-Null } # creates the profiledata.reg file if it doesn't exist if (!(Test-Path "T:\Profile\AppData\Local\FSLogix\ProfileData.reg")) {$regtext | Out-File "T:\Profile\AppData\Local\FSLogix\ProfileData.reg" -Encoding ascii} $script5 | diskpart } |
DOCUMENTACION COMPLETA FSLOGIX
https://docs.fslogix.com/display/20170529/Concurrent+User+Profile+Access
Una de las ventajas de trabajar con FSLogix es que disponen de mucha información detallada que facilita sobre manera su configuración como habéis podido ver en toda la entrada.
¿Te ha gustado la entrada SÍGUENOS EN TWITTER?
¿Te ha gustado la entrada SÍGUENOS EN TWITTER O INVITANOS A UN CAFE?
 Blog Virtualizacion Tu Blog de Virtualización en Español. Maquinas Virtuales (El Blog de Negu) en castellano. Blog informática vExpert Raul Unzue

