Ansible: Gestión básica máquinas virtuales Proxmox
Seguiremos jugando con Ansible bajo linux. Hace ya unos días os expliqué como instalar Ansible en Centos 7.
También hablamos un poco sobre gestionar nuestra infraestructura Proxmox a través de Terraform.
Una vez que vamos entre todos aprendiendo conceptos nuevos, seguimos con las herramientas para automatizar acciones como Ansible. Nos ponemos manos a la obra…partimos que ya tenemos una máquina con Ansible instalado.
Ansible dispone de varios módulos principales para gestionar Proxmox. Estos módulos, de momento, sólo permiten crear, arrancar y detener contenedores LXC.
Así que nos ponemos manos a la obra…
Requerimientos Ansible para Proxmox
A continuación, explicamos los requerimientos en los nodos de Proxmox, en cuanto a paquetes. Deberemos hacerlo en el nodo donde nos interesa lanzar los comandos de Ansible, yo en mi LAB (versión actual 6.2-12) lo hago en todos para no tener nodos con software diferente:
apt install -y python-pip python-dev build-essential

pip update pip

pip install virtualenv

pip install proxmoxer requests
Por recordar, por si empezáis de cero, necesitaremos generar nuestra pareja de claves con SSH-KEYGEN y una vez generadas, habrá que copiarlas a todos los servidores que queremos controlar con Ansible. Recuerdo los comandos:
[root@TERRAFORM ansible]# ssh-keygen
[root@TERRAFORM ansible]# ssh-copy-id -i /root/.ssh/id_rsa SERVER-PROXMOX
Sería así:
|
1 2 3 4 5 6 7 8 9 10 |
[root@TERRAFORM ansible]# ssh-copy-id -i /root/.ssh/id_rsa 192.168.2.51 /bin/ssh-copy-id: INFO: Source of key(s) to be installed: "/root/.ssh/id_rsa.pub" /bin/ssh-copy-id: INFO: attempting to log in with the new key(s), to filter out any that are already installed /bin/ssh-copy-id: INFO: 1 key(s) remain to be installed -- if you are prompted now it is to install the new keys root@192.168.2.51's password: Number of key(s) added: 1 Now try logging into the machine, with: "ssh '192.168.2.51'" and check to make sure that only the key(s) you wanted were added. |
Por otra parte, deberemos definir en el fichero /etc/ansible/hosts los servidores a controlar:
|
1 2 3 4 5 6 7 8 9 10 11 12 13 |
[proxmox1] pve1 ansible_ssh_host=192.168.2.51 [proxmox2] pve2 ansible_ssh_host=192.168.2.50 [proxmox3] pve3 ansible_ssh_host=192.168.2.187 [proxmoxs:children] proxmox1 proxmox2 proxmox3 |
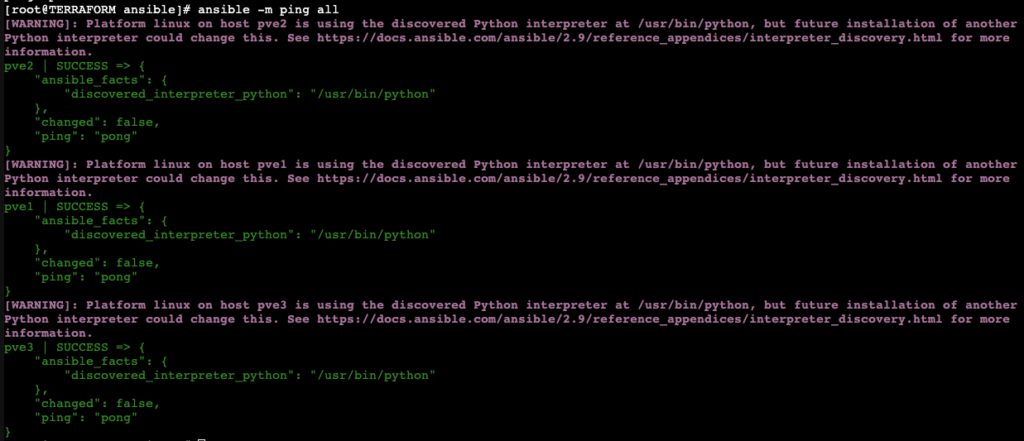
Comprobamos, por ejemplo, que funciona con el siguiente comando:
SI el proyecto es grande, es mejor definir los inventarios, roles,…en sus diferentes secciones.
|
1 2 |
[root@TERRAFORM ansible]# ls ansible.cfg hosts inventory playbooks requirements.yml roles |
Utilizando un fichero con el anterior contenido, pero definido en la carpeta inventario, al que nos vamos a referenciar de la siguiente forma:
|
1 |
[root@TERRAFORM ansible]# ansible -m ping -i inventory/proxmox all |
Requerimientos máquina Ansible
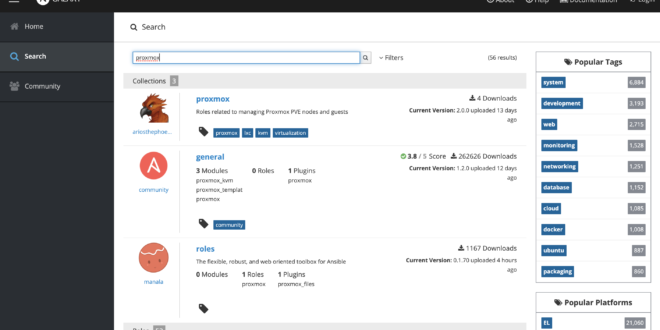
Necesitaremos instalar en nuestra máquina, donde lanzamos los comandos, el siguiente módulo:
https://galaxy.ansible.com/search?deprecated=false&keywords=proxmox&order_by=-relevance&page=1
|
1 2 3 4 5 6 7 8 |
[root@TERRAFORM ansible]# ansible-galaxy collection install community.general Process install dependency map Starting collection install process Installing 'ansible.netcommon:1.3.0' to '/root/.ansible/collections/ansible_collections/ansible/netcommon' Installing 'ansible.posix:1.1.1' to '/root/.ansible/collections/ansible_collections/ansible/posix' Installing 'google.cloud:1.0.1' to '/root/.ansible/collections/ansible_collections/google/cloud' Installing 'community.general:1.2.0' to '/root/.ansible/collections/ansible_collections/community/general' Installing 'community.kubernetes:1.1.1' to '/root/.ansible/collections/ansible_collections/community/kubernetes' |
Podéis también hacerlo mediante un fichero requirements.yml con el siguiente contenido:
|
1 2 |
collections: - name: community.general |
Y el comando:
|
1 2 3 4 |
[root@TERRAFORM ansible]# ansible-galaxy collection install -r requirements.yml Process install dependency map Starting collection install process Skipping 'community.general' as it is already installed |
Comprobar acceso host Proxmox desde Ansible
Para validar el acceso, podemos usar CURL de la siguiente forma:
|
1 |
[root@TERRAFORM ansible]# curl -k -d "username=root@pam&password=introducirpasswd" https://192.168.2.51:8006/api2/json/access/ticket |
Si todo va bien, os soltará información sobre la infraestructura:
Parámetros que podemos usar con name
Os dejo las settings que admite el módulo para proxmox:
|
1 2 3 4 5 6 7 8 9 10 11 12 13 14 15 16 17 18 19 20 21 22 23 24 25 26 27 28 29 |
Supported parameters include: api_host api_password api_user cores cpus cpuunits disk force hostname ip_address memory mounts nameserver netif node onboot ostemplate password pool pubkey searchdomain state storage swap timeout unprivileged validate_certs vmid |
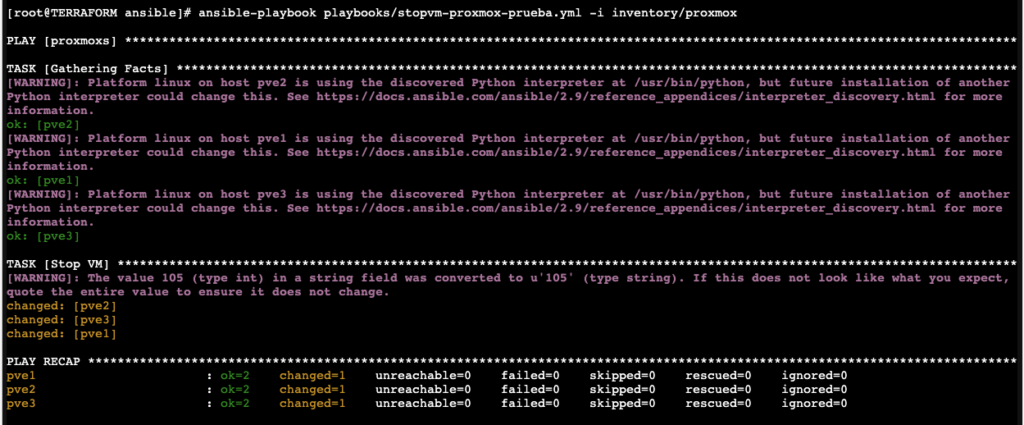
Parar LXC con Ansible en Proxmox
Genero un otro fichero para hacer la parada:
[root@TERRAFORM ansible]# nano playbooks/stopvm-proxmox-prueba.yml
Con el siguiente contenido:
|
1 2 3 4 5 6 7 8 9 10 11 |
--- - hosts: proxmoxs tasks: - name: 'Stop VM' proxmox: api_user: ansible@pve api_password: Prueba1234! api_host: 192.168.2.51 vmid: 105 node: pve1 state: stopped |
Lo lanzamos con:
[root@TERRAFORM ansible]# ansible-playbook playbooks/stopvm-proxmox-prueba.yml -i inventory/proxmox
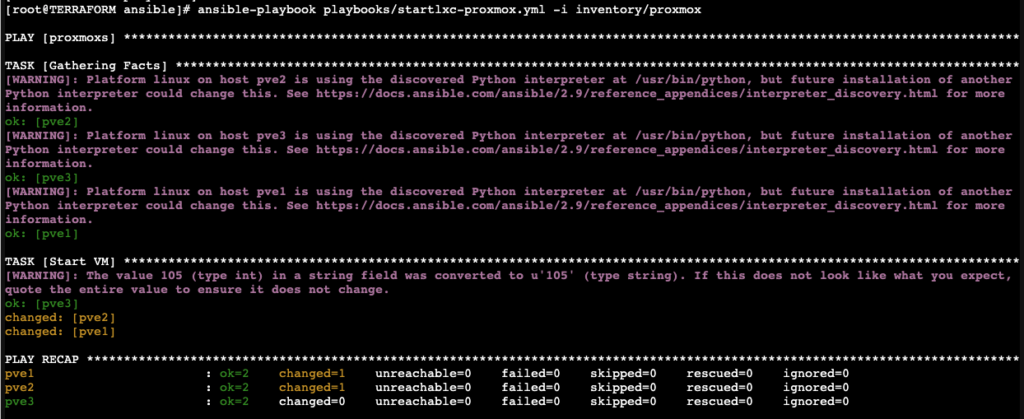
Arrancar un container LXC en Proxmox
Os dejo el ejemplo para arrancar el container:
|
1 2 3 4 5 6 7 8 9 10 11 |
--- - hosts: proxmoxs tasks: - name: 'Start VM' proxmox: api_user: ansible@pve api_password: Prueba1234! api_host: 192.168.2.51 vmid: 105 node: pve1 state: started |
Borra un container LXC en Proxmox
Borrar un container LXC de Proxmox:
|
1 2 3 4 5 6 7 8 9 10 |
--- - hosts: proxmoxs tasks: - name: 'Borrar container LXC' proxmox: vmid: 105 api_user: ansible@pve api_password: Prueba1234! api_host: pve1 state: absent |
Reiniciar un container LXC en Proxmox
Para reiniciar un container:
|
1 2 3 4 5 6 7 8 9 10 |
--- - hosts: proxmoxs tasks: - name: 'Reiniciar container LXC' proxmox: vmid: 105 api_user: ansible@pve api_password: Prueba1234! api_host: pve1 state: restarted |
Crear un container LXC básico en Proxmox
Para crear un container:
|
1 2 3 4 5 6 7 8 9 10 11 |
- hosts: proxmoxs tasks: - name: 'Crear container LXC' proxmox: api_user: ansible@pve api_password: Prueba1234! api_host: 192.168.2.51 vmid: 131 node: pve3 hostname: pruebalxc ostemplate: 'NAS:vztmpl/ubuntu-20.04-standard_20.04-1_amd64.tar.gz' |
Si no sabéis como configurar vuestro storage revisar con este comando:
|
1 2 3 4 5 6 7 8 9 10 11 12 13 14 |
root@pve1:~# pvesm status Name Type Status Total Used Available % HDD rbd active 2779909937 171591729 2608318208 6.17% NAS nfs active 11233707136 8431687936 2802019200 75.06% SSD rbd active 653366690 189614722 463751968 29.02% local dir active 57278576 5855900 48483388 10.22% local-lvm lvmthin active 147279872 0 147279872 0.00% root@pve1:~# pvesm list NAS -content vztmpl Volid Format Type Size VMID NAS:vztmpl/debian-10.0-standard_10.0-1_amd64.tar.gz tgz vztmpl 230629816 NAS:vztmpl/ubuntu-20.04-standard_20.04-1_amd64.tar.gz tgz vztmpl 214203058 NAS:vztmpl/centos-7-default_20190926_amd64.tar.xz txz vztmpl 68649456 NAS:vztmpl/centos-8-default_20191016_amd64.tar.xz txz vztmpl 106244064 |
Seguiremos haciendo cosas más complejas…
¿Te ha gustado la entrada SÍGUENOS EN TWITTER?
¿Te ha gustado la entrada SÍGUENOS EN TWITTER O INVITANOS A UN CAFE?
 Blog Virtualizacion Tu Blog de Virtualización en Español. Maquinas Virtuales (El Blog de Negu) en castellano. Blog informática vExpert Raul Unzue





Hola, quisiera agradecer tu aportación a la comunidad y de camino invitarte a nuestro canal friki de telegram sobre servidores, virtualización y demas. @homelabbers_es
Hay gente muy válida, blogueros importantes a los q nos gustaría q te unieras. Y perdona el spam!!!
Gracias! Le hecho un vistazo