Objetivo del documento
Mostrar la manera de crear, configurar y administrar un cluster de alta disponibilidad con RHEL.
Crear y Configurar Cluster HA con RHEL 5
Proporciona disponibilidad continua en los servicios eliminando puntos únicos de fallo, siendo capaz de pasar un servicio de un nodo a otro en caso de que un nodo se quede no operativo.
Red Hat suite proporciona un cluster de alta disponibilidad mediante su componente High-availability service Management.
Requisitos previos
Dos servidores con RHEL instalado
Dos tarjetas de Red (Una para el heartbeat)
Pasos en la instalación
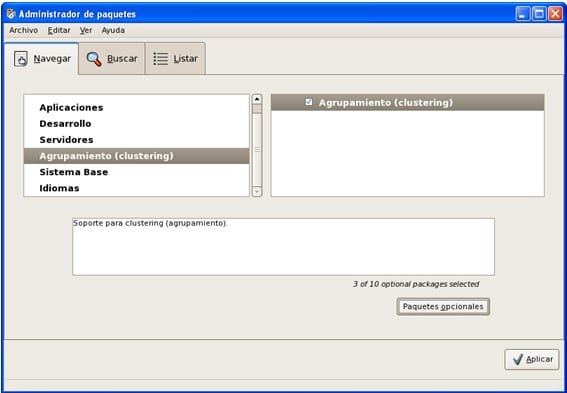
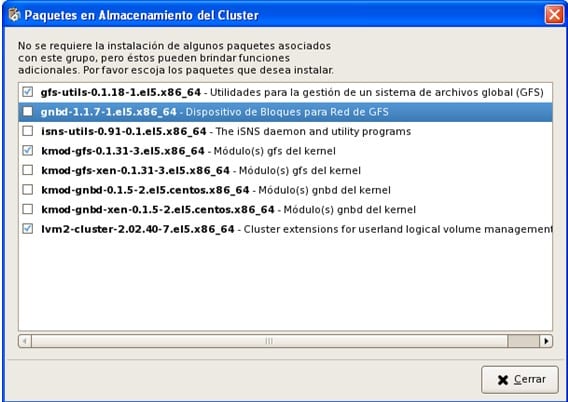
Instalamos el software necesario para crear y administrar el Cluster (en todos los nodos)
Como no vamos a utilizar almacenamiento compartido, y para la configuración y gestión vamos utilizar la herramienta system-config-cluster (no Conga), necesitamos:
Cluster_Administration, rgmanager y system-config-cluster
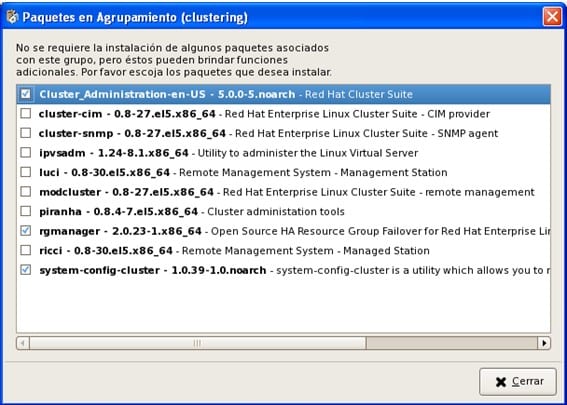
Se nos añaden una serie de dependencias, entre otras cman (Parte de la suite de Cluster)
Una vez realizada la instalación, configuramos las tarjetas de Red, (si no se ha realizado antes).
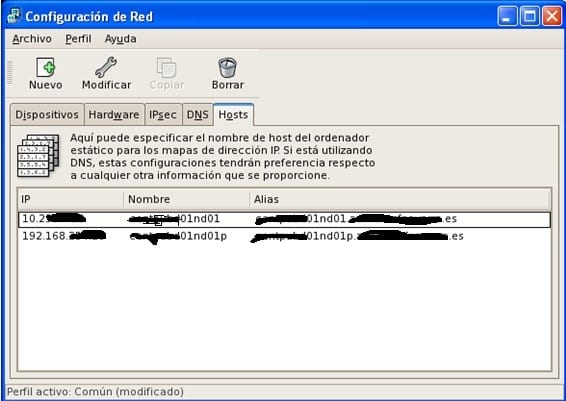
Una tendrá una IP de acceso general y la otra una Ip para realizar el heartbeat entre los nodos. Es importante el configurar el archivo /etc/hosts adecuadamente con esta información.
************************************
There are several reasons for doing this. You may want to do this in cases where you want the cman heartbeat messages to be on a dedicated network so that a heavily used network doesn’t cause heartbeat messages to be missed (and nodes in your cluster to be fenced). Second, you may have security reasons for wanting to keep these messages off of an Internet-facing network.
First, you want to configure your alternate NIC to have its own IP address, and the settings that go with that (subnet, etc).
Next, add an entry into /etc/hosts (on all nodes) for the ip address associated with the NIC you want to use. In this case, eth2. One way to do this is to append a suffix to the original host name. For example, if your node is “node-01” you could give it the name “node-01-p” (-p for private network). For example, your /etc/hosts file might look like this:
# Do not remove the following line, or various programs
# that require network functionality will fail.
127.0.0.1 localhost.localdomain localhost
::1 localhost6.localdomain6 localhost6
10.0.0.1 node-01
192.168.0.1 node-01-p
If you’re using RHEL4.4 or above, or 5.1 or above, that’s all you need to do. There is code in cman to look at all the active network interfaces on the node and find the one that corresponds to the entry in cluster.conf. Note that this only works on ipv4 interfaces.
************************************
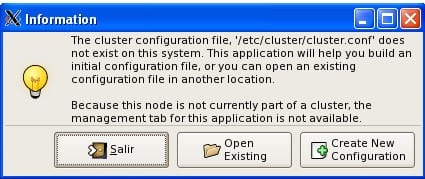
Una vez configuradas las NIC invocamos la herramienta de configuración del Cluster:
System-config-cluster
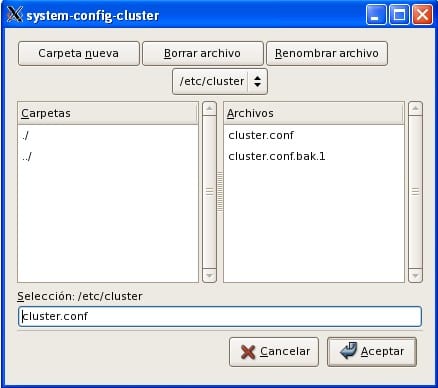
/etc/cluster/cluster.conf es el archivo que contiene toda la configuración del cluster, el archivo que va a crear y modificar esta herramienta. En caso de problemas hay que editarlo a mano y corregirlo.
Elegimos un nombre para el cluster (No se puede Modificar después)
Para comunicarse entre los diversos nodos, el demonio cman crea una IP multicast común a todos los miembros del cluster, la IP comienza por xxx.xxx.x.x y se completa en función del ID del cluster. Para saber la IP multicast que se la ha asignado se puede utilizar el comando cman_tool status (una ver creado y montado el cluster)
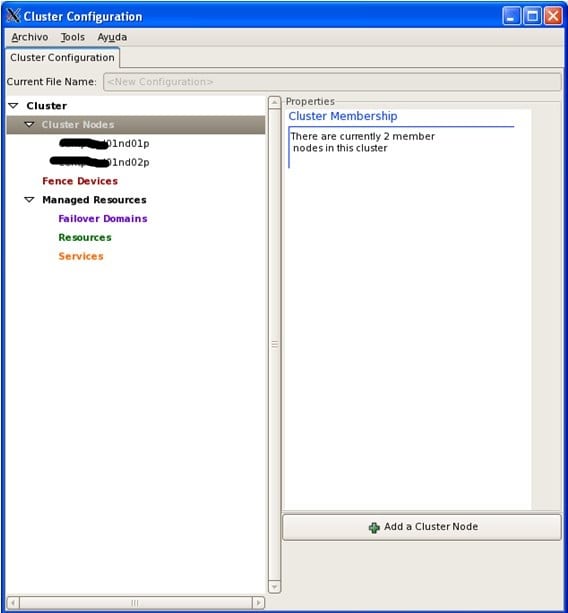
Añadimos los nodos que van a formar parte del cluster:
Ponemos el nombre que hemos indicado en el fichero /etc/hosts a las NIC que vamos a utilizar para el heartbeat.
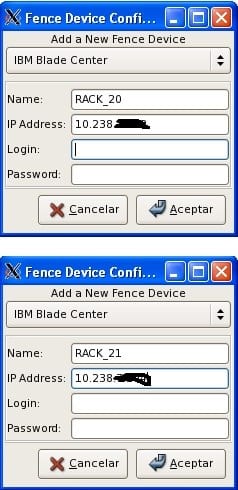
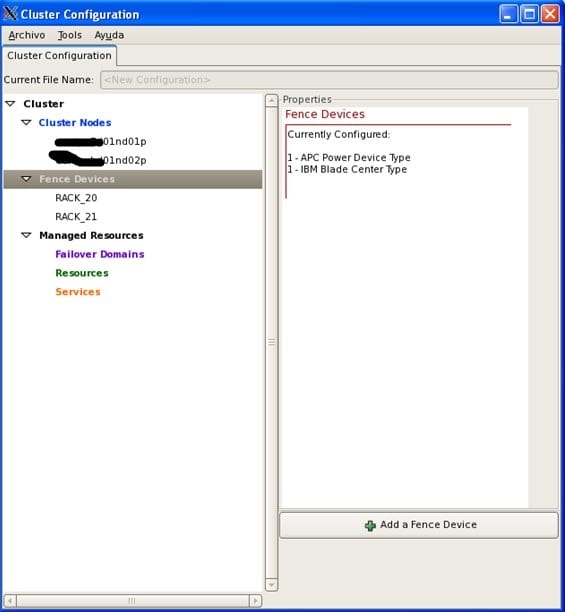
Creamos los dispositivos que vamos a utilizar para realizar el FENCE, (apagado o reinicio del nodo a través de un dispositivo externo, como una tarjeta de gestión ILO, DRAC, una consola de administración de Blade o un Power switch ……)
En nuestro caso como los nodos están en dos Rack de servidores Blade de IBM, creamos un fence device para cada uno de ellos, indicando el tipo de dispositivo (IBM blade center) y la IP de Gestión. Además del usuario y password para realizar la conexión.
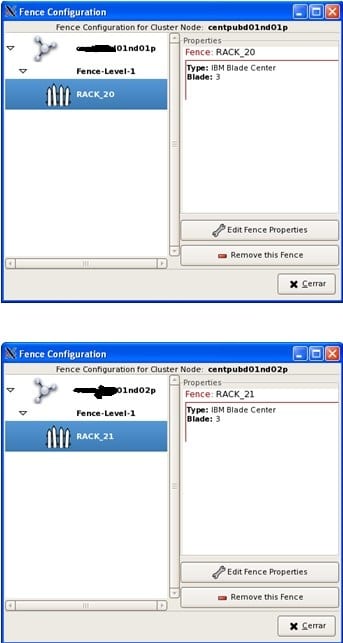
Asignamos cada dispositivo de fence al nodo correspondiente:
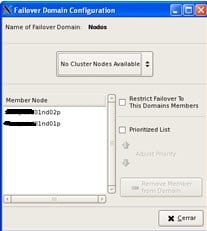
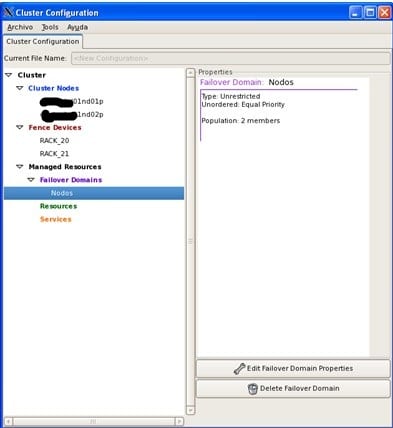
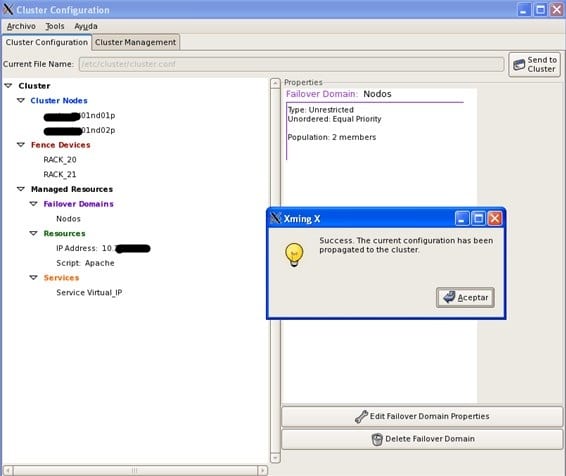
Después creamos un Dominio de Fallo:
Y añadimos los nodos creados anteriormente
A failover domain is a named subset of cluster nodes that are eligible to run a cluster service in the event of a node failure. A failover domain can have the following characteristics:
• Unrestricted — Allows you to specify that a subset of members are preferred, but that a cluster service assigned to this domain can run on any available member.
• Restricted — Allows you to restrict the members that can run a particular cluster service. If none of the members in a restricted failover domain are available, the cluster service cannot be started (either manually or by the cluster software).
• Unordered — When a cluster service is assigned to an unordered failover domain, the member on which the cluster service runs is chosen from the available failover domain members with no priority ordering.
• Ordered — Allows you to specify a preference order among the members of a failover domain. The member at the top of the list is the most preferred, followed by the second member in the list, and so on.
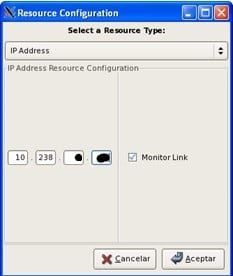
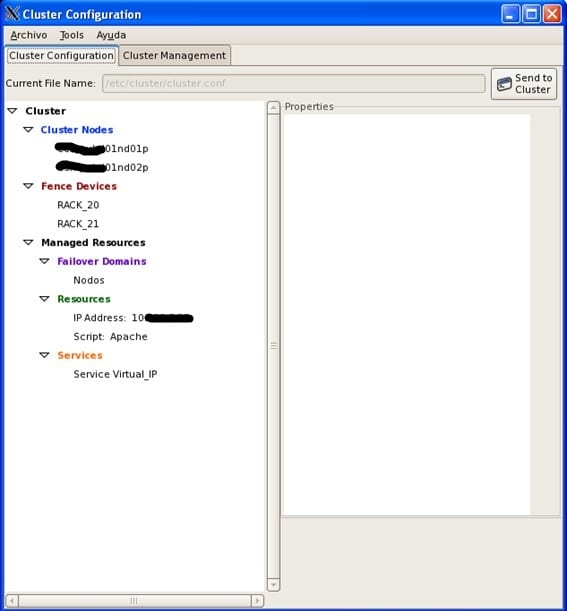
A continuación creamos los recursos que se van a gestionar en el cluster:
La dirección IPvirtual
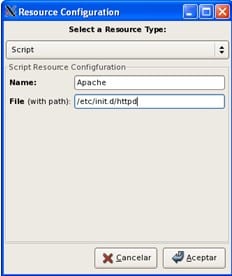
Un servidor Apache
Para crear el recurso del servidor Apache utilizamos el Recurso script y señalamos el Path al script de gestión de Apache
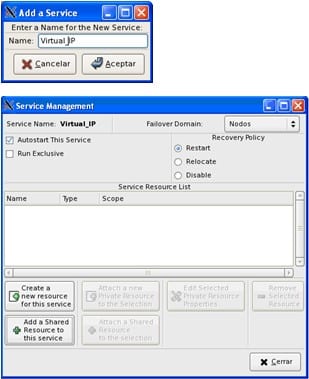
Y los asignamos a un Servicio que luego lo añadiremos a nuestro dominio de fallo.
Indicamos el Dominio de Fallo (Nodos)
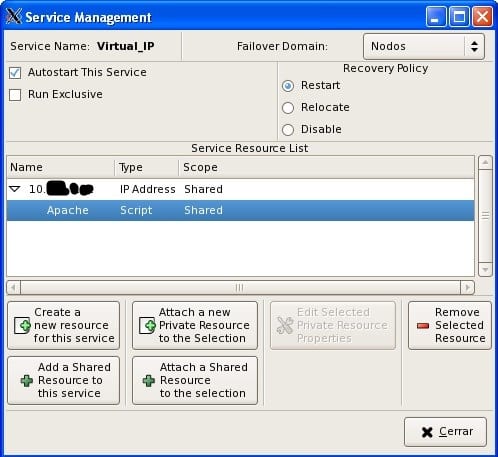
If you want to restrict the members on which this cluster service is able to run, choose a failover domain from the Failover Domain drop-down box
Autostart This Service checkbox — This is checked by default. If Autostart This Service is checked, the service is started automatically when a cluster is started and running. If
Autostart This Service is not checked, the service must be started manually any time the cluster comes up from stopped state.
Run Exclusive checkbox — This sets a policy wherein the service only runs on nodes that have no other services running on them. For example, for a very busy web server that is clustered for high availability, it would be advisable to keep that service on a node alone with no other services competing for his resources — that is, Run Exclusive checked.
On the other hand, services that consume few resources (like NFS and Samba), can run together on the same node without little concern over contention for resources. For those types of services you can leave the Run Exclusive unchecked.s are empty.
Select a recovery policy to specify how the resource manager should recover from a service failure. At the upper right of the Service Management dialog box, there are three Recovery
Policy options available:
• Restart — Restart the service in the node the service is currently located. The default setting is Restart. If the service cannot be restarted in the current node, the service is relocated.
• Relocate — Relocate the service before restarting. Do not restart the node where the service is currently located.
• Disable — Do not restart the service at all.
Añadimos los recursos que hemos creado previamente:
Pulsamos Add a Shared Resource for this service y añadimos la Ip virtual
Marcamos en el Recurso IP Address y pulsamos Attach a Shared Resource to the selection y añadimos el recurso Apache.
Hay que guardar (Archivo Guardar)
En la primera configuración hay que copiar a mano el archivo /etc/cluster/cluster.conf del nodo en que los hemos creado al otro.
scp /etc/cluster/cluster.conf root@xxxx01nd02:/etc/cluster
Y arrancar los servicios en este orden
Service cman start
Service rgmanager start
Para parar los servicios se hace en orden inverso
Service rgmanager stop
Service cman stop
Para hacer que los servicios se arranquen de manera automática:
chkconfig –level 2345 cman on
chkconfig –level 2345 rgmanager on
Formatear la partición con GFS2
mkfs.gfs2 -p lock_dlm -t Cluster:global -j 4 /dev/sdb
chkconfig –level 2345 gfs2 on
Modificar /etc/fstab
/dev/sdb /global gfs2 defaults,_netdev,quota=off,noatime,nodiratime 0 0
/dev/sdc /cuaderno gfs2 defaults,_netdev,quota=off,noatime,nodiratime 0 0
Propuesta de soporte RHEL
**********************************************************************
-El número máximo de POSIX locks es por defecto 100 por segundo. Obviamente esto puede implicar una bajada de performance, si vas a hacer un uso masivo de los locks. Si quieres eliminar ese límite, añade las siguientes líneas a tu cluster.conf:
<cman/>
…
<dlm plock_ownership=”1″ plock_rate_limit=”0″/>
<gfs_controld plock_rate_limit=”0″/>
…
</cluster>
Asegurate de que updatedb no corre en los puntos de montaje de GFS2.
Por último, asegurate de que los alias de ls no usan la opción –color. Esto es porque en sistemas GFS y GFS2, cuando el punto de montaje se muestra lento, la primera opción es probar un “ls” para ver qué ocurre. Si la opción –color está activada, ls hará llamadas a stat() contra cada entrada, creando más locks y provocando bloqueos en esos ficheros con respecto a otros procesos. Lo más fácil es eliminar la opción añadiendo lo siguiente en /etc/profile para que cada afecte a cada usuario:
alias ll=’ls -l’ 2>/dev/null
alias l.=’ls -d .*’ 2>/dev/null
unalias ls
**********************************************************************
Mkfs.gfs2
En la primera implementación puede ser necesario el parar y arrancar los servicios varias veces hasta que se sincronicen los nodos.
Cuando se realicen cambios posteriores, para propagar la configuración entre los nodos basta con pulsar el botón: Send to Cluster
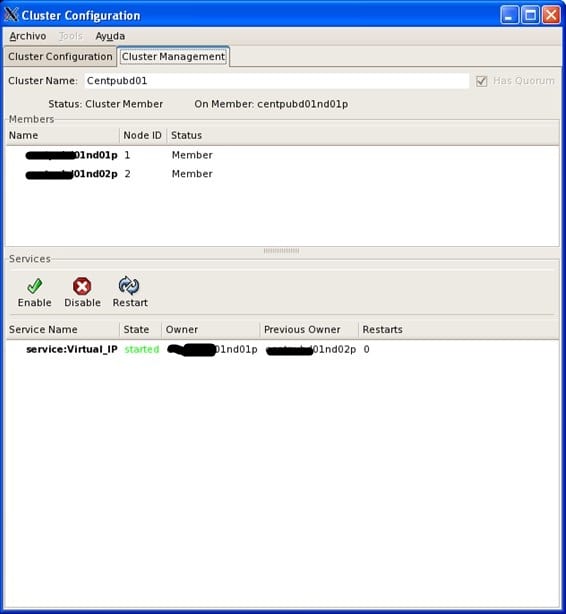
En la pestaña ClusterManagement, vemos el estados de los nodos y en qué nodo se esta ejecutando el servicio
¿Te ha gustado la entrada SÍGUENOS EN TWITTER O INVITANOS A UN CAFE?
 Blog Virtualizacion Tu Blog de Virtualización en Español. Maquinas Virtuales (El Blog de Negu) en castellano. Blog informática vExpert Raul Unzue


